Hello Crafters,
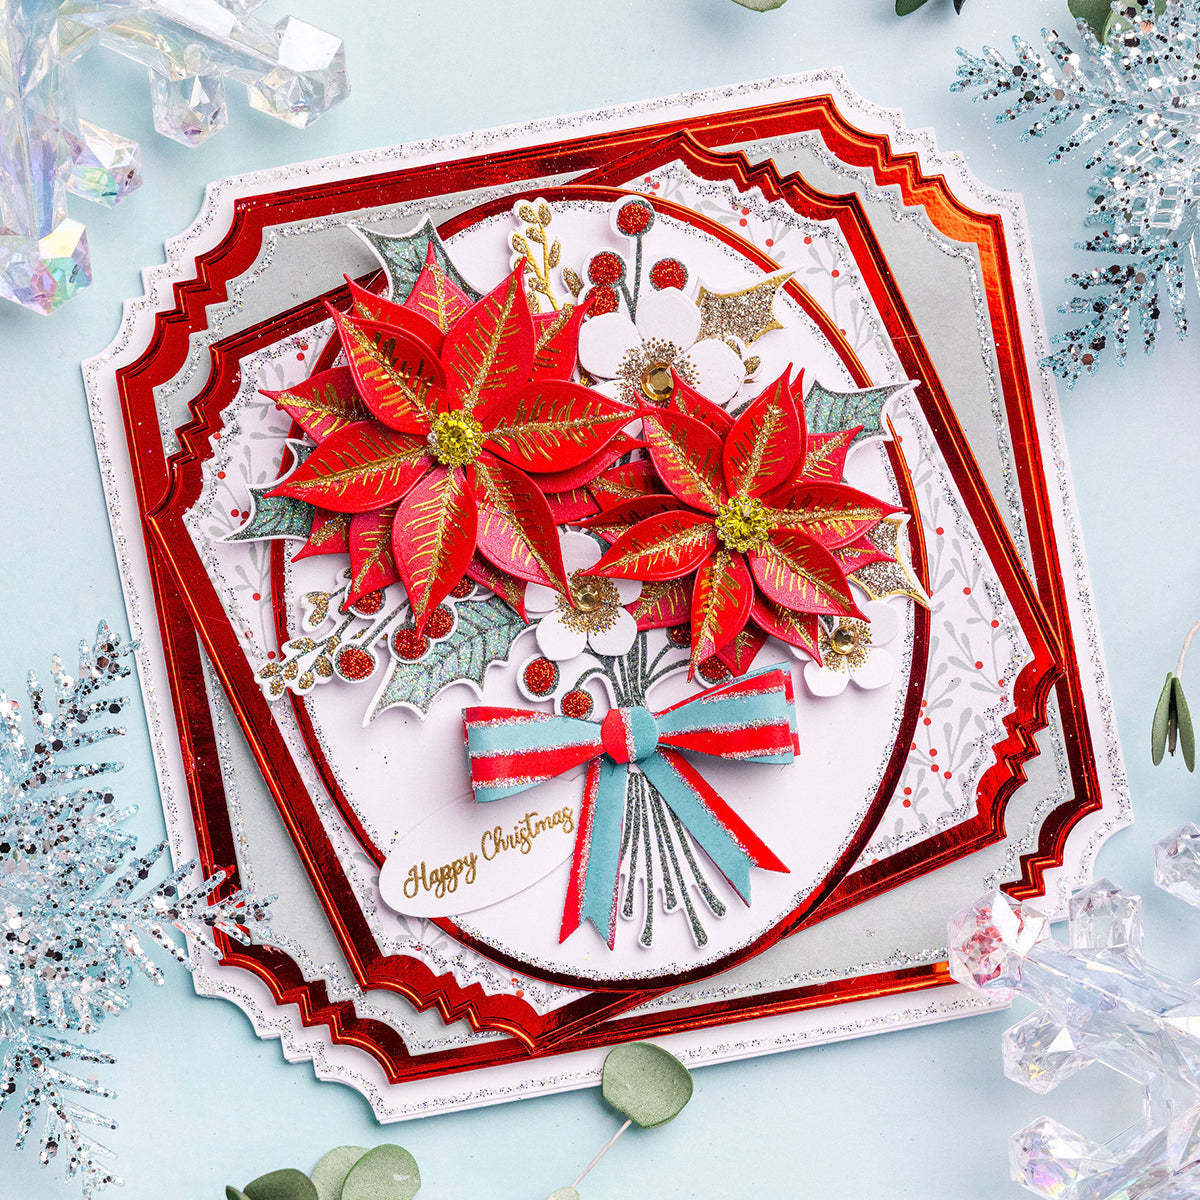
Today's card tutorial is brought to you by the super-talented Glynis and features the brand-new Christmas Build-a-Bouquet collection. This bright and cheery design would also be perfect, with a simple change of sentiment, for a vivid, dimensional card for wintertime birthdays or a framed picture.
Read on for a full, step-by-step project tutorial, complete with a materials list that has been linked, allowing you to click on each product and be directed to its respective web page, making shopping easy.

YOU WILL NEED:
- Christmas Build-a-Bouquet collection:
- Stamp and die set – Christmas Bouquet Builder
- Stamp and die set – Beautiful Bouquet Christmas Flowers
- Metal die set – 3D Bow
- 8x8” designer paper pad – Christmas Flowers and Foliage
- Metal die set – Gilded Squares
- Nesting die set – Basic Ovals
- A4 smooth white card
- Pearl card – Jupiter
- Sparkelicious glitters – Santa Suit, Glass Slipper, Diamante Sparkle, Dulce de Leche, and Crystallina
- Sparklers – 12mm
- Bling Box – Beautiful Bouquets
- WOW! embossing powder – Polished Gold and Festive Branches
- WOW! clear embossing inkpad
- Marker pens
- Foam pads on a roll
- Art Glitter Dries-Clear PVA glue
- Pinflair 3D glue gel
- 8x8” white straight-edged card blank
- WOW! heat tool
- Die-cutting machine
INSTRUCTIONS:
1 Place the top of the largest die from the Gilded Square die set just over the score line of a card blank and die-cut. Using the same die, cut into smooth white card, then adhere to the main card and glitter inside the grooves using dries-clear glue and Diamante Sparkle Sparkelicious glitter. Cut two matts using the same die set in red mirror card and patterned paper. Glitter the grooves on the patterned paper panel, then matt and layer both panels together, and secure onto the main card with foam pads. For the next layer, repeat this process, using smaller dies this time.
2 From the Basic Oval die set, cut two ovals in red mirror card and white card, glitter around the edges of the white panel. Matt and layer the panels and secure onto the base card with foam pads.
3 Stamp, heat-emboss and die-cut the main bouquet image using Festive Branches embossing powder onto white card. Colour the foliage with the marker pens and cover with Crystallina, Dulce de Leche, and Santa Suit Sparkelicious glitters. Secure in place using 3D glue gel. Stamp, heat-emboss and die-cut the poinsettia flowers using Polished Gold embossing powder onto Jupiter pearl card. Cover with Dulce de Leche Sparkelicious glitter, shape the petals, and construct using 3D glue gel.
4 For the extra foliage, stamp, heat-emboss and die-cut using Polished Gold and Festive Branches embossing powders. Colour and glitter the foliage as per the main image. Stamp, heat-emboss and die-cut the Christmas rose using Polished Gold embossing powder onto white card. Accent with Dulce de Leche Sparkelicious glitter and affix a jewel from the Beautiful Bouquet Bling Box to the middle of each. Arrange the flowers and foliage onto the main card and secure them in place with 3D glue gel.
5 For the bow, draw different coloured stripes onto white card using a ruler, trying not to overlap the stripes, then cover with Glass Slipper Sparkelicious glitter. Die-cut the coloured card, assemble the pieces together, and secure them in place with 3D glue gel.
6 Stamp, heat-emboss, and die-cut the sentiment, then secure it in place. Using a marker pen, colour the 12mm Sparklers and secure to the middle of each poinsettia to finish.


Remember to share your creations on our Facebook and Instagram pages and follow us to keep up to date with all the latest news and collections.
Chloe x


