Hello Crafters,
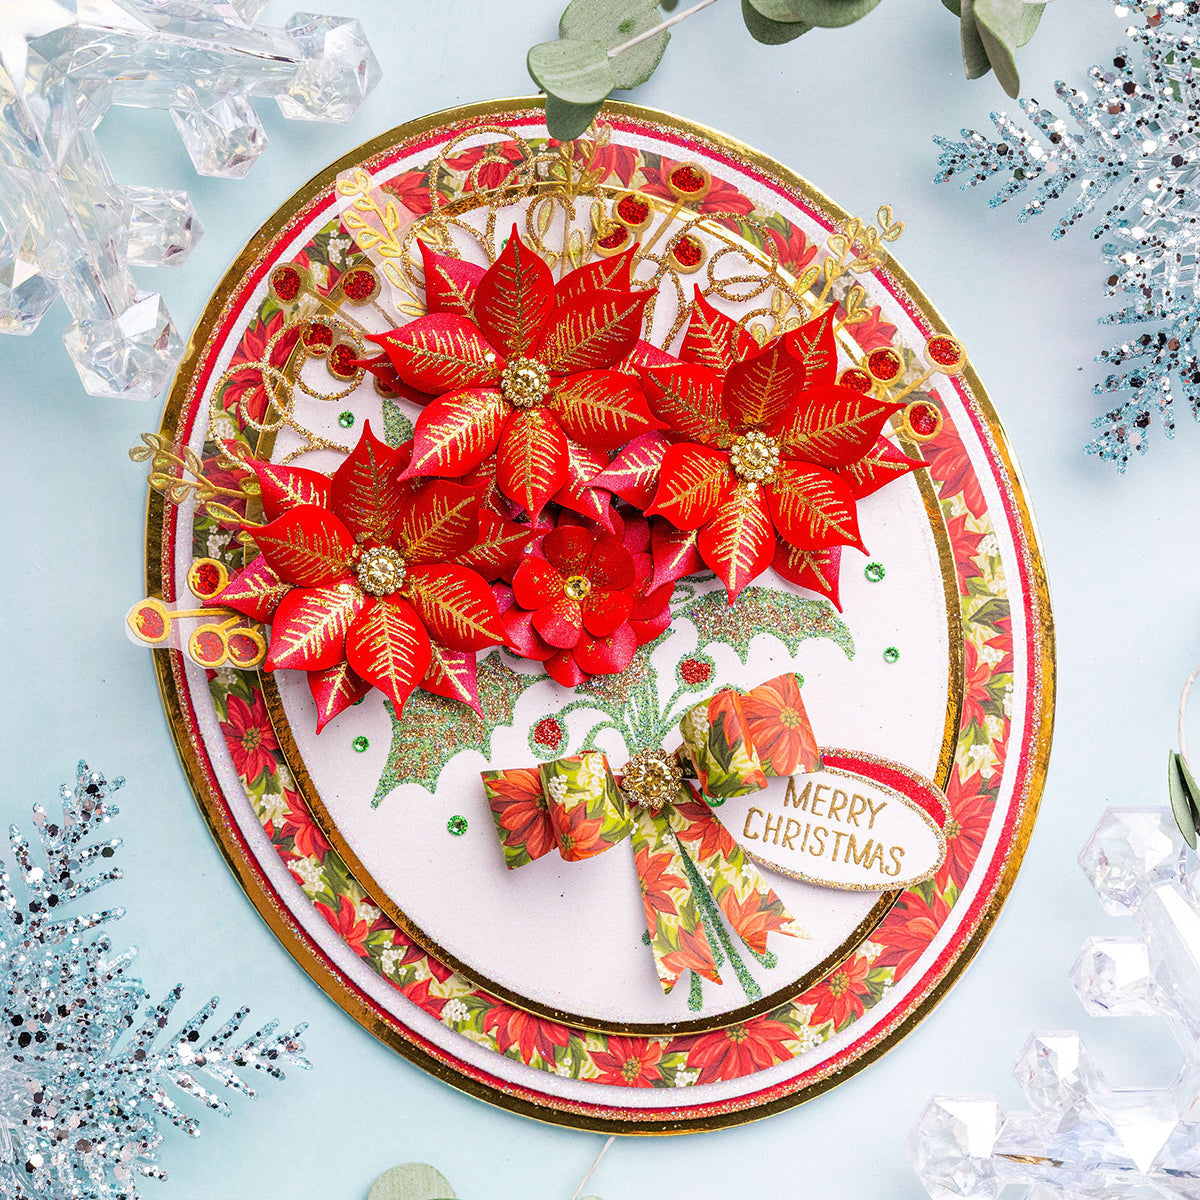
Today, we have this beautiful, dimensional Christmas card tutorial for you, created by the super-talented Christine. In just a few quick and easy steps, you too can create this rich red, white, and gold design that uses items from the brand-new Christmas Build-a-Bouquet collection.
Read on for a full, step-by-step project tutorial, complete with a materials list that has been linked, allowing you to click on each product and be directed to its respective web page, making shopping easy.

YOU WILL NEED:
-
Christmas Build-a-Bouquet collection:
- Stamp and die set – Christmas Bouquet Builder
- Stamp and die set – Beautiful Bouquet Christmas Flowers
- Stamp and die set – Christmas Tiny Tag and Sentiments
- Metal die set – 3D Bow
- 8x8” designer paper pad – Christmas Flowers and Foliage
- Stamp and die set – Christmas Rose
- Nesting die set – Basic Ovals
- A4 pearl card – Crystal White and Jupiter
- A4 pearl paper – Jupiter
- Mirror card – Gold
- Heat-resistant acetate
- WOW! clear embossing inkpad
- WOW! embossing powder – Twinkling Lights, Nordic Pine, and Polished Gold Super Fine
- Sparkelicious glitter – Crystallina, Santa's Suit, Lime Zing, Dulce de Leche, and Gold Rush
- Sparklers – 10mm and 12mm
- Self-Adhesive Sparkles – Glorious Greens and Luscious Yellows
- Yellow marker pen
- Foam pads on a roll
- Chisel-tip glue pen
- Pinflair 3D glue gel
- Art Glitter Dries-Clear PVA glue
- 8x8” white straight-edged card blank
- WOW! heat tool
- Die-cutting machine
INSTRUCTIONS:
1 Create an oval card blank using the largest Basic Ovals die. Cut a sheet of gold mirror card using the same die and affix to the card blank using dries-clear adhesive. Die-cut a sheet of Jupiter pearl card using the second-largest Basic Ovals die, edge with Dulce de Leche Sparkelicious glitter, and affix to the card front with foam pads. Die-cut Crystal White pearl card using the third-largest die from the Basic Ovals die set, edge with Crystallina Sparkelicious glitter, and affix to the card front using foam pads. Die-cut a sheet of poinsettia-patterned paper from the paper pad using the fourth-largest Basic Ovals die, then affix to the card front with foam pads. Finally, die-cut gold mirror card using the seventh-largest Basic Ovals die and affix to the card front with foam pads.
2 Die-cut a piece of Crystal White pearl card using the eighth-largest Basic Ovals die, then stamp the main bouquet image using the clear embossing inkpad. Cover with Nordic Pine embossing powder and heat set. Add Santa’s Suit Sparkelicious glitter to the Berries and Dulce de Leche glitter to the holly leaves within the image using dries-clear adhesive. Edge the panel with Crystallina Sparkelicious glitter and affix to the card front using foam pads.
3 Stamp 12 small poinsettias onto Jupiter pearl paper using the clear embossing inkpad, cover with Twinkling Lights embossing powder and heat set. Die-cut the flowers using the corresponding dies. Layer up the flowers using glue gel to create three small poinsettias, then add a sprinkle of Gold Rush Sparkelicious glitter to the centre of each. Colour three 10mm Sparklers using the yellow marker pen and adhere to the flowers using glue gel. Affix the flowers to the bouquet, as shown, using glue gel.
4 Stamp one medium and two large roses from the Christmas Flowers stamp and die set onto Jupiter pearl paper using a clear embossing inkpad, cover with Twinkling Lights embossing powder and heat set. Die-cut the flowers using the corresponding dies. Layer up the flowers using glue gel to create one large flower. Add a sprinkle of Gold Rush Sparkelicious glitter to the centre and a Luscious Yellow Self-Adhesive Sparkle. Affix the flower to the bouquet, as shown, using glue gel.
5 Die-cut three swirls from white card using the swirl die from the Christmas Rose stamp and die set, cover with dries-clear adhesive, then sprinkle over Dulce de Leche Sparkelicious glitter, and add to the bouquet, as shown, using glue gel.
6 Stamp four eucalyptus branches and four berry sprigs onto heat-resistant acetate using clear embossing ink, cover with Polished Gold Super Fine embossing powder, heat set, then fussy cut. Using dries-clear adhesive, add Lime Zing Sparkelicious glitter to the reverse of the eucalyptus branches and Santa’s Suit Sparkelicious to the reverse of the berry sprigs. Once dry, affix to the bouquet, as shown, using glue gel.
7 Die-cut a sheet of matching patterned paper from the paper pad using the 3D Bow die set. Assemble the bow, as shown, using dries-clear adhesive and affix to the card front. Colour a 12mm Sparkler using the marker pen and affix to the centre of the bow using glue gel.
8 Using the small tag die from the Christmas Tiny Tag and Sentiments stamp and die set, die-cut Crystal White and Jupiter pearl card. Stamp ‘Merry Christmas’ from the same set onto the Crystal White tag using the clear embossing inkpad, cover with Polished Gold Super Fine embossing powder and heat set. Edge both tags with Dulce de Leche Sparkelicious glitters, then layer the tags together and tuck under the bow, affixing with glue gel. Add some Glorious Greens Self-Adhesive Sparkles to the background to finish.


Remember to share your creations on our Facebook and Instagram pages and follow us to keep up to date with all the latest news and collections.
Chloe x


