
Happy New Year to all our fabulous crafters!
Today's card making project from Glynis features some BEE-AUTIFUL products from our latest drop!
Today's card making project from Glynis features some BEE-AUTIFUL products from our latest drop!
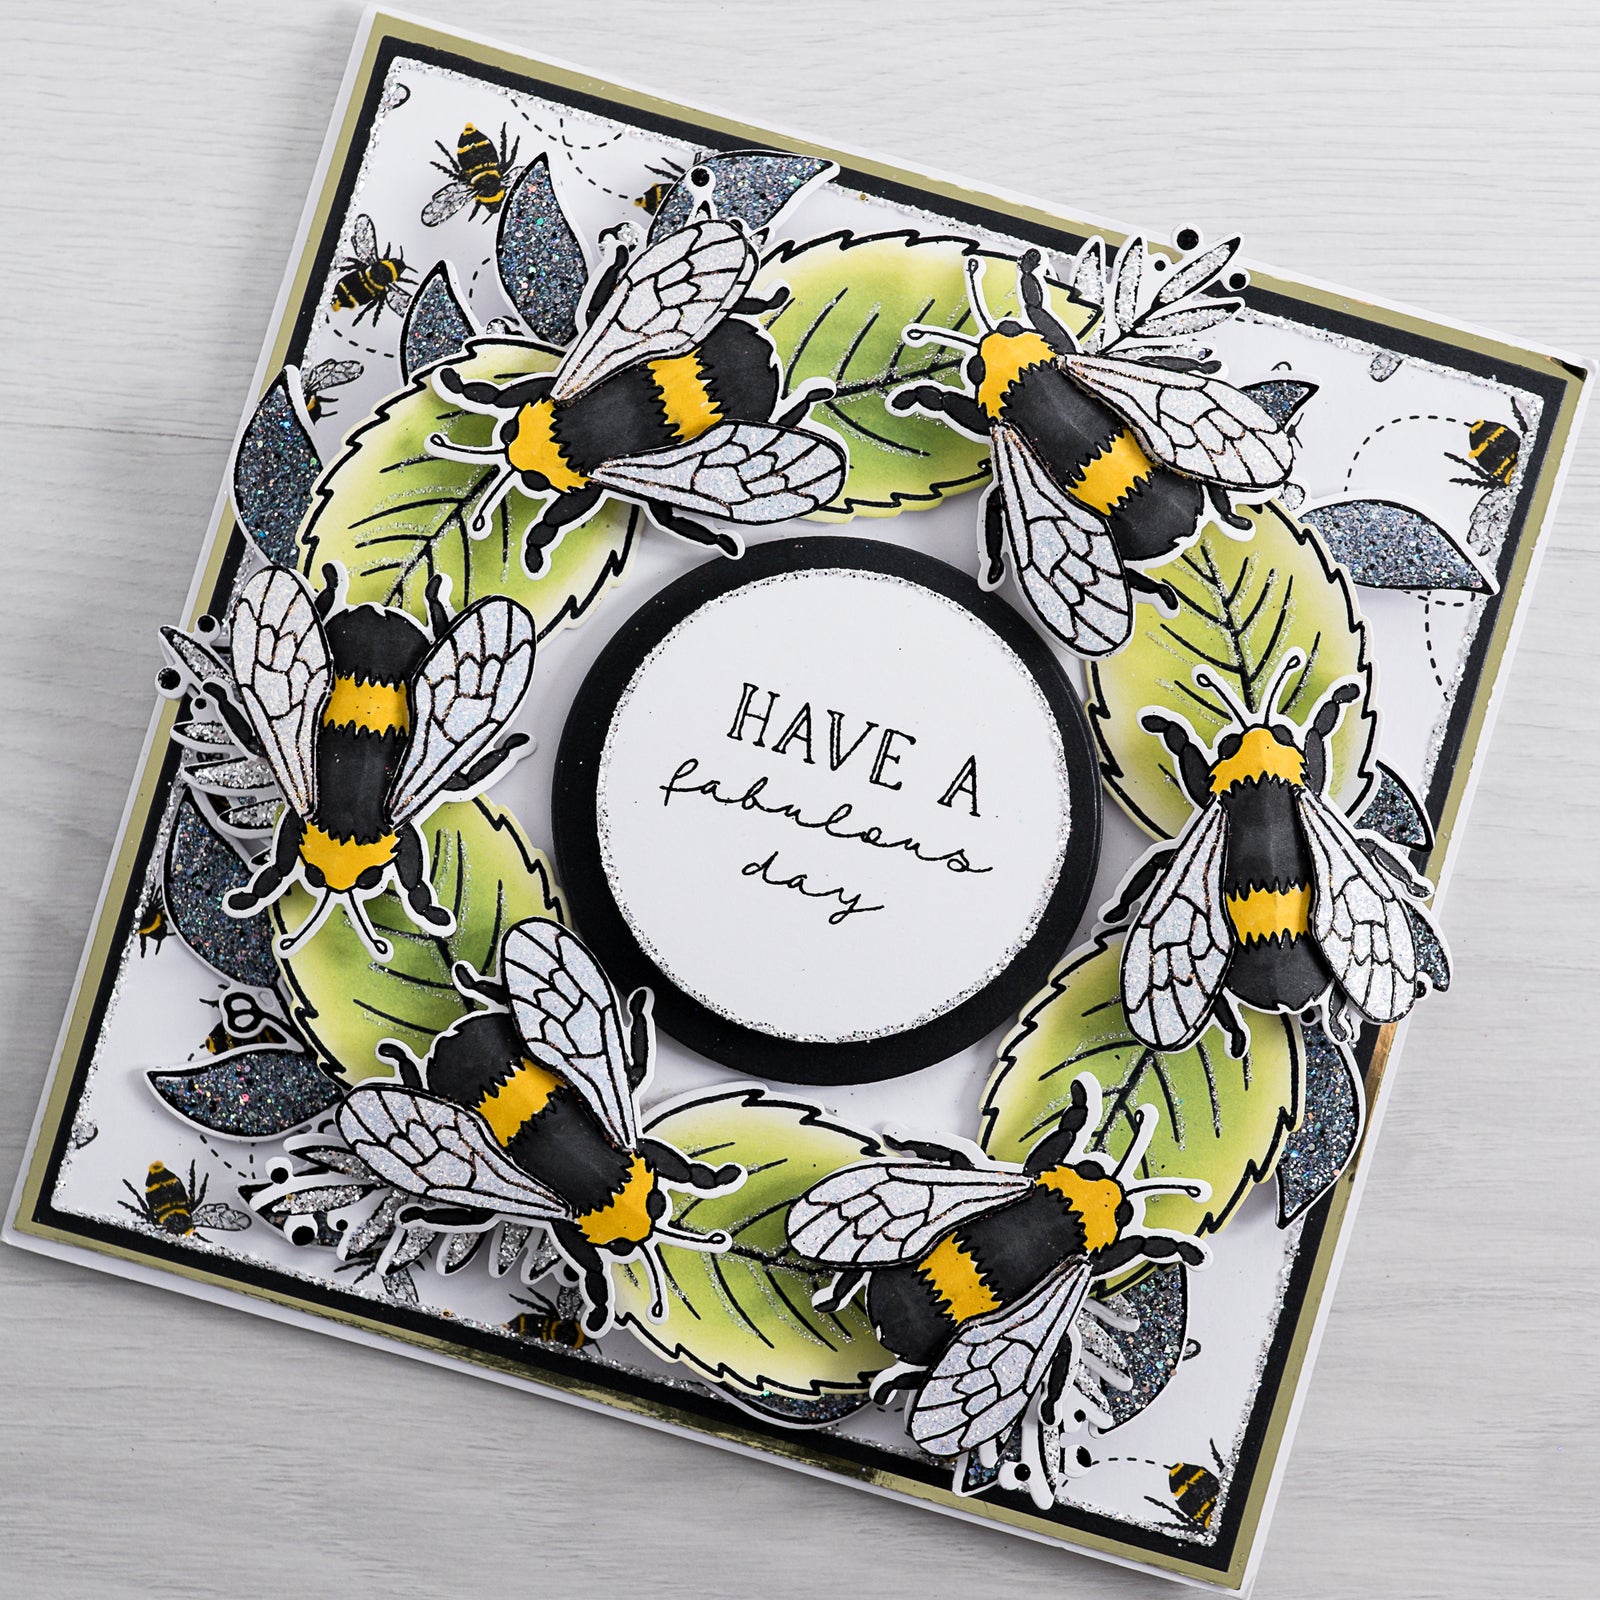
Glynis has used our popular Bee Background Stamp that we launched last year to stamp these delicate bee decals onto the base card, whilst batch stamping using our new Queen Bee Stamp and Die Set to create this show stopping foliage wreath design!
I just love the ink details on this card, these extra details make such a huge impact as you create a delicate and fine illustrated card that works perfectly with this new collection.
You will need:
- Chloes Creative Cards 8x8 Metal Die Set - Basic Squares
- Chloes Creative Cards 8x8 Metal Die Set - Basic Circles
- Summer Foliage Stamp and Die Set
- Chloes Creative Cards Bee Background Stamp
- Chloes Creative Cards Queen Bee Stamp and Die Set
- Chloes Creative Cards Lacy Tag Stamp and Die Set
- Chloes Creative Cards Sugared Mirror Card Pad
- White Card
- Sparkelicious Glitter in Disco Ball, Glass Slipper and Diamante Sparkle
- WOW Primary Ebony Superfine Embossing Powder
- Chloes Luxury Pearl Card Onyx
- Versafine Clair Black Ink Pad
- Tim Holtz Distress Oxide Ink Pads in Mowed Lawn and Twisted Citron
- Coloured Maker Pens
- Art Glitter Dries Clear PVA Glue
- Chloes Creative Cards 3mm Foam Pads on a roll
- Heat Gun
- White 8" x 8" Straight Edge Card Blank
- Die Cutting Machine

Instructions:
- Die cut a piece of the Yellow Mirror Card from the Sugared Pastels Mirror Card Pad Pad using the second die from the Ex Large Basic Squares Die Set and attach to the Base Card.
- Stamp onto White Card with the Versafine Clair Black Ink the DL Bee Background Stamp, line it up next to the previous stamped image and repeat.
- Die cut this piece with the fourth die from the Ex Large Basic Squares Die Set glitter around the four sides with Diamante Sparkle Sparkelicious.
- Colour and glitter the bees with a yellow marker pen and Glass Slipper Sparkelicious, mat and layer on to a piece on Onyx Pearl Card and attach to the Base Card with Foam Pads.

- Die cut a white circle using the Ex Large Basic Circles Die Set and attach to the middle of the Base Card with Foam Pads.
- Stamp the Queen Bees and Summer Foliage Stamp and Die Set on to White Card using the Versafine Clair Black Ink, colour the large leaf with the Oxide Ink and glitter with Glass Slipper Sparkelicious, decorate the other foliage with Diamante Sparkle and Disco Ball Sparkelicious and secure around the circle with Collall 3D Glue Gel

- Colour and glitter the Queen Bees with Glass Slipper Sparkelicious and attach to the Base Card.
- Stamp and heat emboss the sentiment from the Lacy Tag Stamp and Die Set onto White Card using the Ebony Superfine Embossing Powder.
- Die cut with a small circle from the Ex Large Basic Circles Die Set, glitter all around with Diamante Sparkle Sparkelicious, mat and layer onto a Onyx Pearl Card Circle with Foam Pads and attach to the Base Card.

I hope you've enjoyed being super busy making this gorgeous Bee Wreath card using our tutorial from Glynis today, it's certainly brightened up our day!
Remember to share your creations on our Facebook and Instagram pages and follow us to keep up to date with all the latest news and collections.
Chloe x


