Chloe's Blog

Decagon and Rose Mallow Flower Project by Rebecca Houghton

Decagon and Rose Mallow Flower Project by Rebecca Houghton

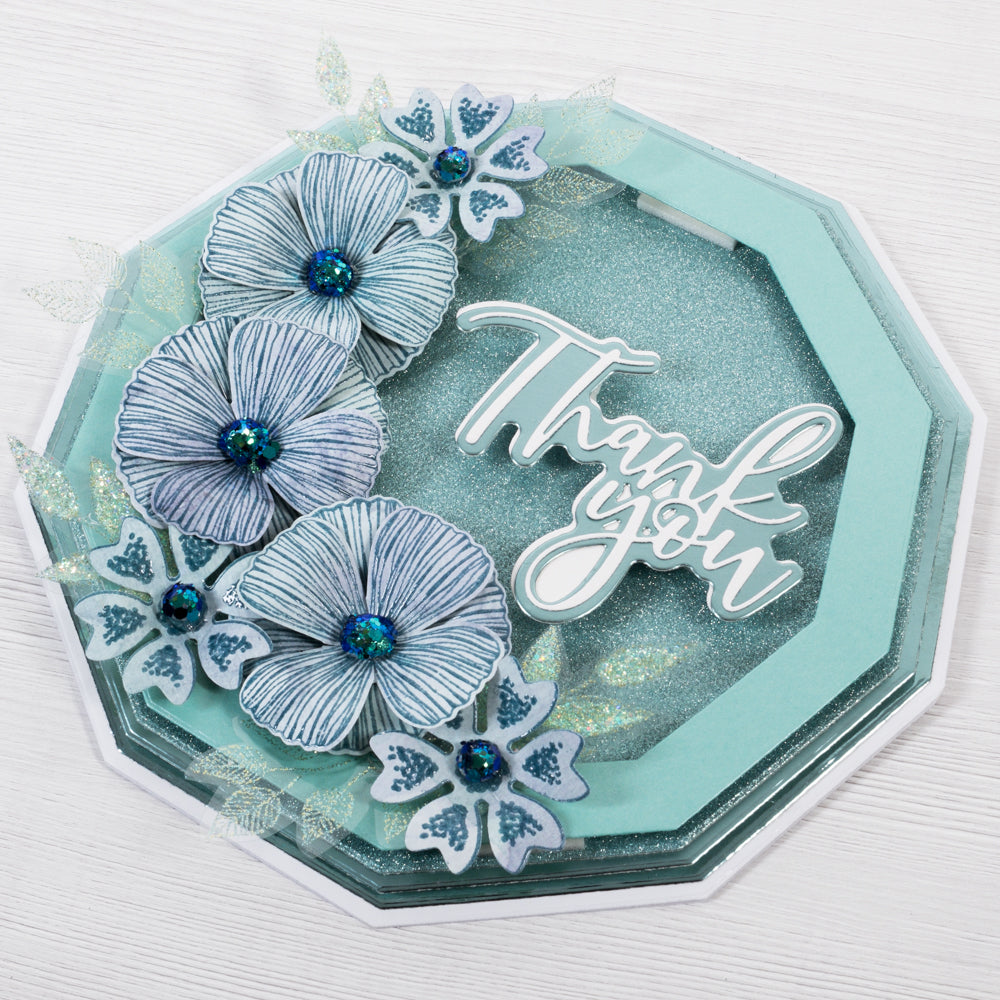
Teal, Blue & Green Glitter Thank You.  Chloes Creative Cards. (Card making tutorial).
I absolutely love how she has used our new Decagon Metal Die Set to create this fancy card blank.  The teal blue colour theme is gorgeous and look at how she's mixed and layered our Matt, Mirror, Pearl and Glitter Card ranges for maximum impact.
I can't wait to see all of your recreations at home.  Please remember to share them on our Facebook and Instagram pages.  Chloe x


You will need: 


 What you will need:

    1. Using die 1 from the decagon nesting die set create a shaped card by cutting using the largest die.  

    2. Use die 2 and cut into a piece of Lagoon mirror card. Affix to the card using dries clear glue. Cut a decagon from Lagoon Matt mirror card using die. Affix to the card using foam pads. Use die 4 and cut from Lagoon glitter card . Affix using dries clear glue. 

      3. Using die 5 and 9 create a frame by cutting into a piece of Lagoon pearl card. Affix the the card on a double layer of foam pads. 
      Teal, Blue & Green Glitter Thank You.  Chloes Creative Cards. (Card making tutorial). Sentiment message die cutting stamp
       
      4. Take the the Thank you stamp and die set, cut the outer layer and the sentiment from Crystal White pearl card. And the middle layer from Lagoon Matt mirror card. Affix the three layers together using dries clear glue offsetting the middle layer and the bottom layer to create a dropped shadow. Affix to the card using a double layer of foam pads. 

      5. Stamp 6 of the medium rose mallow flower onto a piece of patterned paper from the watercolour washes paper pad . Heat emboss using night sky wow powder. Die cut using the coordinating die. Layer together using Collall 3d glue gel  by offsetting the petals.  

      6. Take the 6 petaled flower from the delightful daisies stamp set, stamp 3 onto the same patterned paper as the rose mallow flowers. Again heat emboss using night sky wow powder. Die cut using the coordinating die. 
       
      Teal, Blue & Green Glitter Thank You.  Chloes Creative Cards. (Card making tutorial).
       
      7. Arrange all of the flowers onto the card and glue into place using 3d glue gel.
      8. Stamp out the leaf foliage stamp onto heat resistant acetate 3 times and heat emboss using appletini wow powder Apply dries clear glue to the back of the leaf shapes and cover in parakeet sparkelicious glitter. Once dry, trim and add behind the flowers using 3d glue gel .  
      Teal, Blue & Green Glitter Thank You.  Chloes Creative Cards. (Card making tutorial).
      9. Stamp out the largest leaf foliage stamp 3 times onto heat resistant acetate and heat emboss using appletini wow powder. Trim to the required size and tuck behind the flowers, securing using 3d glue gel .  
       
      10. Cover some flat back pearl in dries clear glue and cover in peacock medley sparkelicious glitter. When dry add to the centres of the flowers.  

      Teal, Blue & Green Glitter Thank You.  Chloes Creative Cards. (Card making tutorial).

      1 comment

      This card is beautiful love it will be trying to make this

      Carol MAnifield ,

      Leave a comment

      Please note: comments must be approved before they are published.