
Hello Crafters,
I'm here today with a pretty floral birthday card tutorial that uses a great selection of coordinating products from our website. I love mixing and matching across collections to show just how versatile they all are, and I hope that you like this example of what you can achieve. I kept the colours really soft here, but you can play about to create different results - monochromatic black and white will give a really edgy look, or try doing it all white for minimalistic elegance!
Read on for a full step-by-step project tutorial, complete with a materials list that has been linked so you can click on each product to be sent to its respective web page, making it easy for you to shop.

YOU WILL NEED:
- 8x8” nesting dies – Scalloped and Pierced Squares
- 5x7” 3D embossing folder, stamp & die set – Flower Swirl
- Metal die set – Mandala of Beauty
- Stamp set – Birthday Happiness
- 8x8” designer paper pad – Fabulous Florals and Flutters
- Luxury pearl card – Crystal White
- Smooth white card
- Designer printed vellum – Rose Quartz Wash
- Sparkelicious glitter – Chunky Crystallina, Grasshopper, Diamante Sparkle, and Crystallina
- WOW! embossing powder – Clear Gloss and Opaque Bright White
- Sparklers – 10mm and 12mm
- Self-adhesive Sparkles – Pretty Pinks
- Versafine inkpad – Morning Mist
- WOW! clear embossing inkpad
- Foam pads on a roll
- Chisel-tip glue pen
- Pinflair 3D glue gel
- Art Glitter Dries-Clear glue with a fine-tip applicator
- 8x8” white straight-edged card blank
- WOW! heat tool
- Die-cutting machine
INSTRUCTIONS:
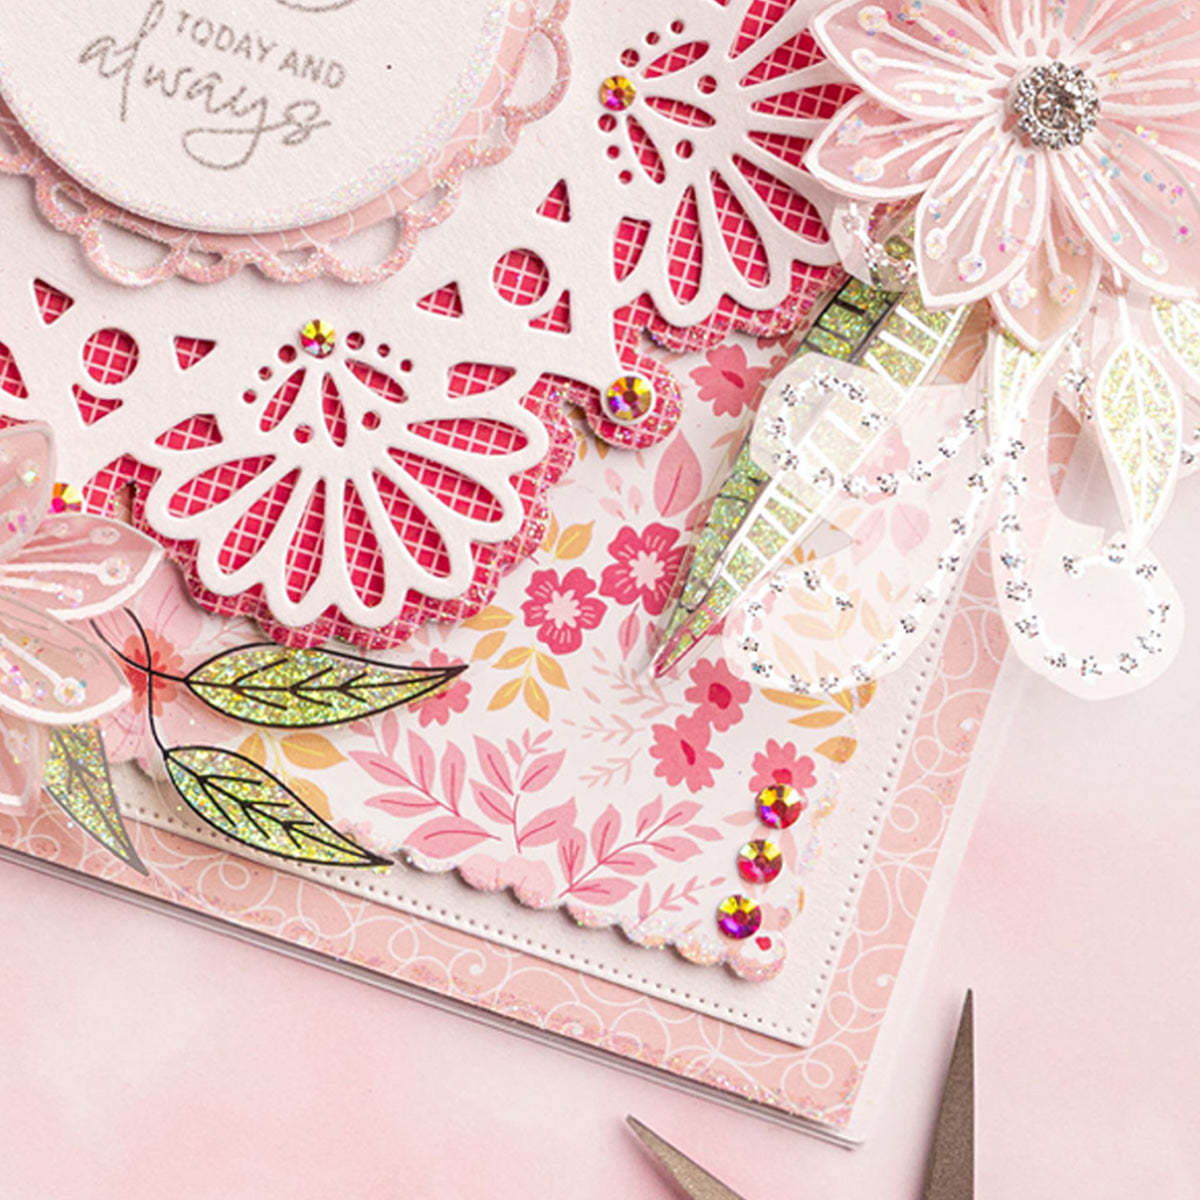
1 Take a sheet of patterned paper and trim down to 7¾” square, then affix to the card blank using Dries-Clear glue. Die-cut the largest pierced square from Crystal White pearl card and affix to the card blank using foam pads. Die-cut a scalloped square from patterned paper and edge with glue using a chisel-tip glue pen. Cover in Crystallina Sparkelicious glitter and affix to the card using foam pads.
2 Die-cut the outer layer of the mandala from patterned paper and the detailed layer from Crystal White pearl card. Matt and layer together, then affix to the card using foam pads. Die-cut the scalloped circle from the set from patterned paper, edge with Crystallina Sparkelicious glitter and affix to the mandala's centre. Die-cut the smaller plain circle from white pearl card and stamp a sentiment into the centre using the Morning Mist inkpad. Heat set with Clear Gloss embossing powder. Edge with Crystallina Sparkelicious glitter and affix to the card.
3 Take some Fabulous Foliage and glitter the back of the leaves using Dries-Clear glue and Grasshopper Sparkelicious glitter, and the swirls with Diamante Sparkle Sparkelicious glitter. Once dry, carefully cut out.
4 Stamp six large and eight medium flowers onto Rose Quartz vellum using a clear embossing inkpad and heat-emboss using Opaque Bright White embossing powder. Die-cut using the coordinating dies. Apply dots of Dries Clear glue to the petals and cover in Chunky Crystallina Sparkelicious glitter. Once dry, shape the petals by creating a valley fold down the centre of each one. Layer together and affix to the card using 3D glue gel. Tuck in the foliage behind using 3D glue gel.
5 Die-cut two stamens from Crystal White pearl card and affix to the centres of the large flowers. Add a sparkler to the centre of each flower. Add a few self-adhesive sparkles to the corners and the mandala to finish.


Remember to share your creations on our Facebook and Instagram pages and follow us to keep up to date with all the latest news and collections.
Chloe x


